This article describes how an app can be deployed to the Cloud Foundry environment of the SAP Business Technology Platform. The prerequisite is a configured subaccount with the Cloud Foundry Runtime enabled. Details can be found in our article on setting up global accounts and subaccounts.
Key points:

Prefer deployment with the Cloud Foundry command line tool over manual deployment in the BTP cockpit

When deploying with the Cloud Foundry command line interface, all necessary apps and services are automatically created and connected to each other

To set up the process you need to install the Cloud Foundry command line interface and a plugin.
The MTAR File
Applications are deployed using files with the `.mtar` extension, which stands for “Multi-Target Application.” MTAR files are renamed zip files that contain not only the application’s source code but also all the necessary configuration files. The files are created and provided by developers or service providers.
When you unzip an MTAR file, you’ll find these important configuration files:
- xs-security.json: Contains the pre-configured role templates that are automatically created in BTP
- META-INF/mtad.yaml: Lists all apps and their required services. With the help of this file, all required services can be automatically created and connected to the apps during deployment
Why Use the Command Line Interface?
In the SAP BTP Cockpit, there is a “Deploy Application” button on the applications page of the space (see screenshot below). This should not be used. When deploying with this button, additional configuration steps must be performed that are not only time-consuming but also error-prone.

To get started with deploying apps in the BTP, we recommend using the Cloud Foundry command line interface (CLI). It automatically performs the following steps:
- Upload the MTAR to SAP BTP
- Create and start all apps
- Create all necessary services, such as authentication, connectivity, or database
- Connect the services to the apps. This is necessary so that the apps can also use the services
- Create or update database artifacts such as tables or initial data
- Create routes so that the apps can be accessed from a browser
- Generate role templates for granting user permissions
When using the BTP user interface (i.e. using the “Deploy Application” button), you’d need to perform most of these steps manually. Another advantage of using the CLI is that it enables automated deployment through scripts and continuous integration and delivery pipelines.
While the Cloud Foundry CLI is a great option for your first couple of deployments, we recommend that you consider using the Cloud Transport Management service for regular operations. It provides a graphical user interface, the ability to schedule deployments and extensive logging.
Setup
Step 1: Install the Cloud Foundry CLI
Download the Cloud Foundry CLI from this page on GitHub.
On the download page, look for the “Installer and compressed binaries” section. You can choose between:
- Installer: einer Installationsdatei. Wie empfehlen diese Option, falls Sie häufiger Applikationen in der BTP deployen werden.
- Binaries: einer eigenständig ausführbaren Datei.
After you have downloaded and (in the case of the installer) installed the file, open your terminal and check if the CLI is executable by typing cf or cf8. If the command is not found, you’ll need to either add the CLI to your system’s PATH environment variable or navigate to the directory containing the executable.
Step 2: Install the MTA Plugin
To add the MTA plugin, execute the following command:
- cf8 install-plugin multiapps
In case the multiapps plugin is not found, you need to add the Cloud Foundry community repository:
- cf8 add-plugin-repo CF-Community https://plugins.cloudfoundry.org
Once the plugin has been successfully added, your setup is complete.
Deploying Your Application
Step 1: Log Into SAP BTP
Connect to your Cloud Foundry environment in SAP BTP using:
- cf8 login
During login, you’ll need to provide:
- Username und Passwort: identisch mit Ihrem Login zum BTP-Cockpit
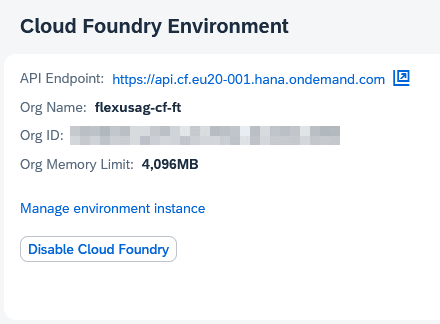
- API-Endpunkt: Diesen können Sie auf der Seite “Overview” im Subaccount, in den Sie sich einloggen wollen, finden (siehe Screenshot unten)
The API endpoint you use during your first login becomes the default for future logins. Use cf8 login to connect to the same endpoint again, or specify a different one with the -a flag. For example:
- cf8 login -a https://api.cf.jp10-001.hana.ondemand.com
Troubleshooting: If you encounter certificate issues, use:
- cf8 login –skip-ssl-validation
This ignores faulty or missing certificates.
Step 2: Deploy Your MTAR File
After authentication, select the space where you want to deploy your application. To deploy the MTAR file, it must be available locally. Start deployment using:
- cf8 deploy PATH_TO_YOUR_MTAR_FILE
Replace PATH_TO_YOUR_MTAR_FILE with the actual path to your MTAR file.
After the file has been uploaded, all the deployment steps listed above are automatically executed. If no error messages appear, your deployment was successful.
Hinweis: Nach dem Deployment kommt eine kurze Meldung, dass die Logs zum Deployment heruntergeladen werden können. Insbesondere im P-System wird empfohlen diese Logs herunterzuladen und abzuspeichern, selbst wenn keine Fehler aufgetreten sind.
Your application is now successfully deployed and ready to use in the SAP Business Technology Platform.