Key points:

The Cloud Connector can be connected to internal systems such as fleet managers.

A prerequisite for this is connecting the Cloud Connector to BTP.

As soon as the Cloud Connector is connected to SAP BTP and an internal system, a secure connection can be established between the two.
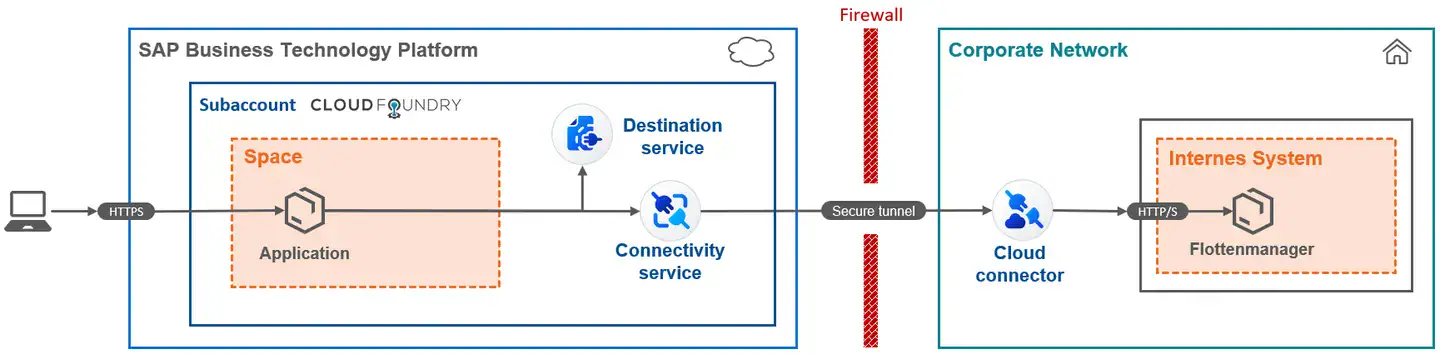
The SAP Business Technology Platform is a cloud that is accessible from the Internet. For some applications, you need to establish a connection to internal non-SAP systems. For example, the FlexGuide4 by Flexus can connect directly to AGVs or fleet managers to coordinate traffic management.
However, fleet managers and AGVs typically run in a protected zone where direct connections from the internet or SAP BTP are not permitted. To avoid direct connections, you can use SAP’s Cloud Connector software as a proxy.
In this article, we will show you how to configure the Cloud Connector and a destination in order to establish a connection to an internal system. This requires a configured Cloud Connector that has been connected to the subaccount. You can find instructions for the Cloud Connector setup in this article.
The following graphic illustrates the BTP architecture that this tutorial will set up:
Configuration in the Cloud Connector
Note: The following instructions describe how to connect a fleet manager (i.e. an internal system) with FlexGuide4 from Flexus (i.e. an application in SAP BTP).
In some projects, AGVs do not connect directly to the MQTT broker prescribed in VDA5050, but are instead managed by the manufacturer’s fleet manager. To integrate these AGVs, FlexGuide4 must be enabled to call the fleet manager API.
If your project uses MiR or Agilox AGVs, you must also perform this step. FlexGuide4 routes all outgoing connections—both to SAP systems and to fleet managers—through destinations.
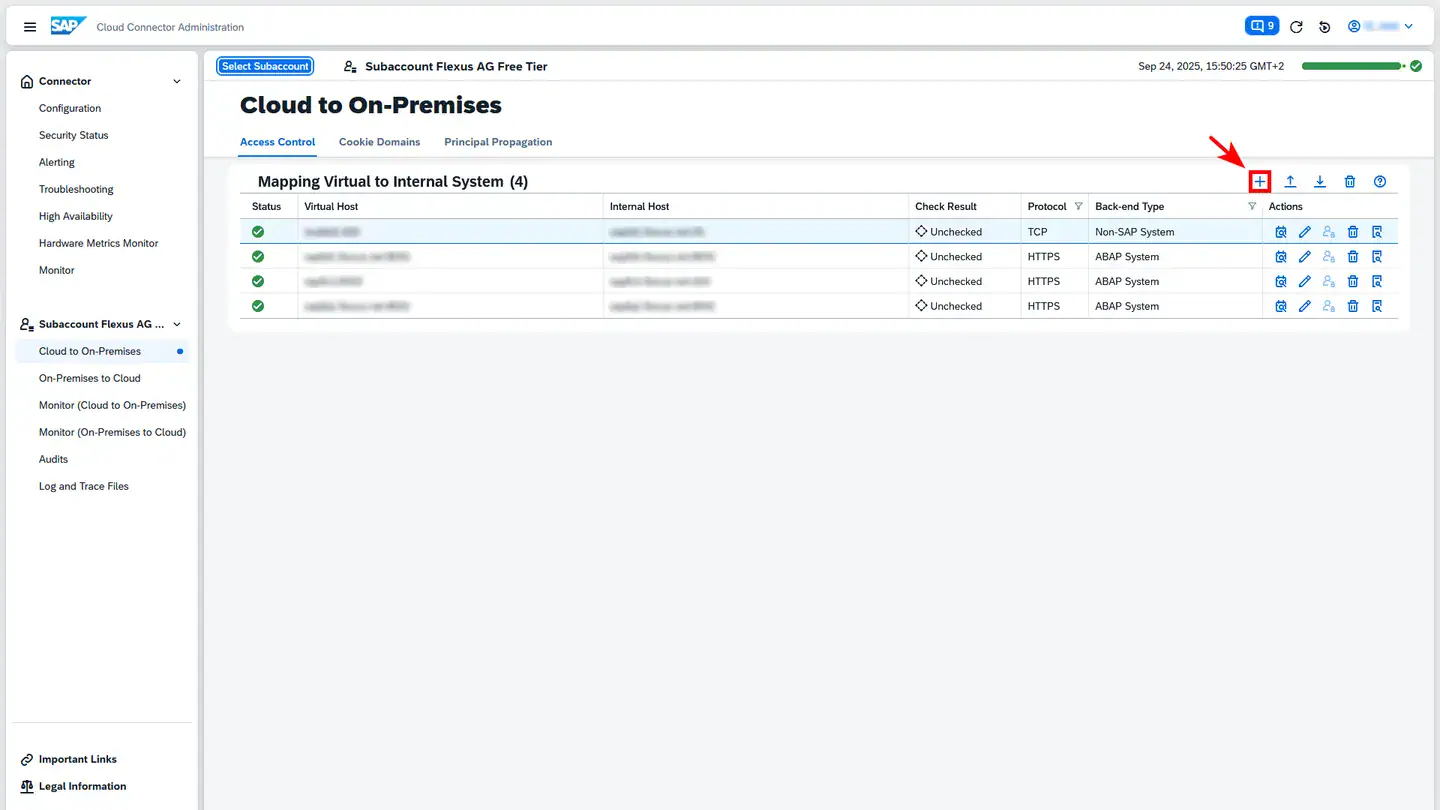
First, add a new system mapping in the Cloud Connector. Select the appropriate subaccount and create a new mapping in the Cloud To On-Premises section. Existing mappings appear under Mapping Virtual to Internal System. Click the plus icon to the right above the table to create a new mapping:
In the subsequent dialogs, configure the following settings:
- Back-end Type: Non-SAP System
- Protocol: HTTPS
- Internal Host: IP/URL of the fleet manager in the internal network
- Internal Port: Port of the fleet manager in the internal network
- Virtual Host: Use a value different from the internal host to mask it, for increased security
- Virtual Port: Use a value different from the internal port
- Allow principal propagation: activated
- Principal Type: X.509 Certificate
- Note: This applies to Cloud Connector version 2.15 or higher. For version 2.14.2 or lower, select “X.509 Certificate (Strict Usage)”
- Host In Request Header: Use Virtual Host
- Description: optional
- Check Internal Host: activated
The virtual host and port are the values exposed externally. This allows you to hide the IP or URL of the internal host from external access. Alternatively, you can set the virtual host to the same value as the internal host.
Principal Propagation enables users already logged in to BTP to access the target system without logging in again.
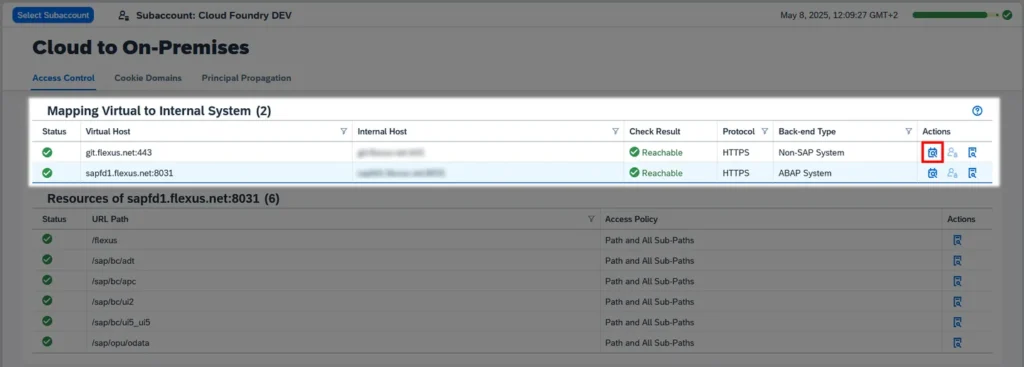
The Check Internal Host option verifies whether the Cloud Connector can reach the on-premise system via TLS protocol. You can also trigger this check at any time by clicking Check availability of internal host in the corresponding table row:
After reviewing the settings and activating the internal host check in the final dialog, save the system mapping.
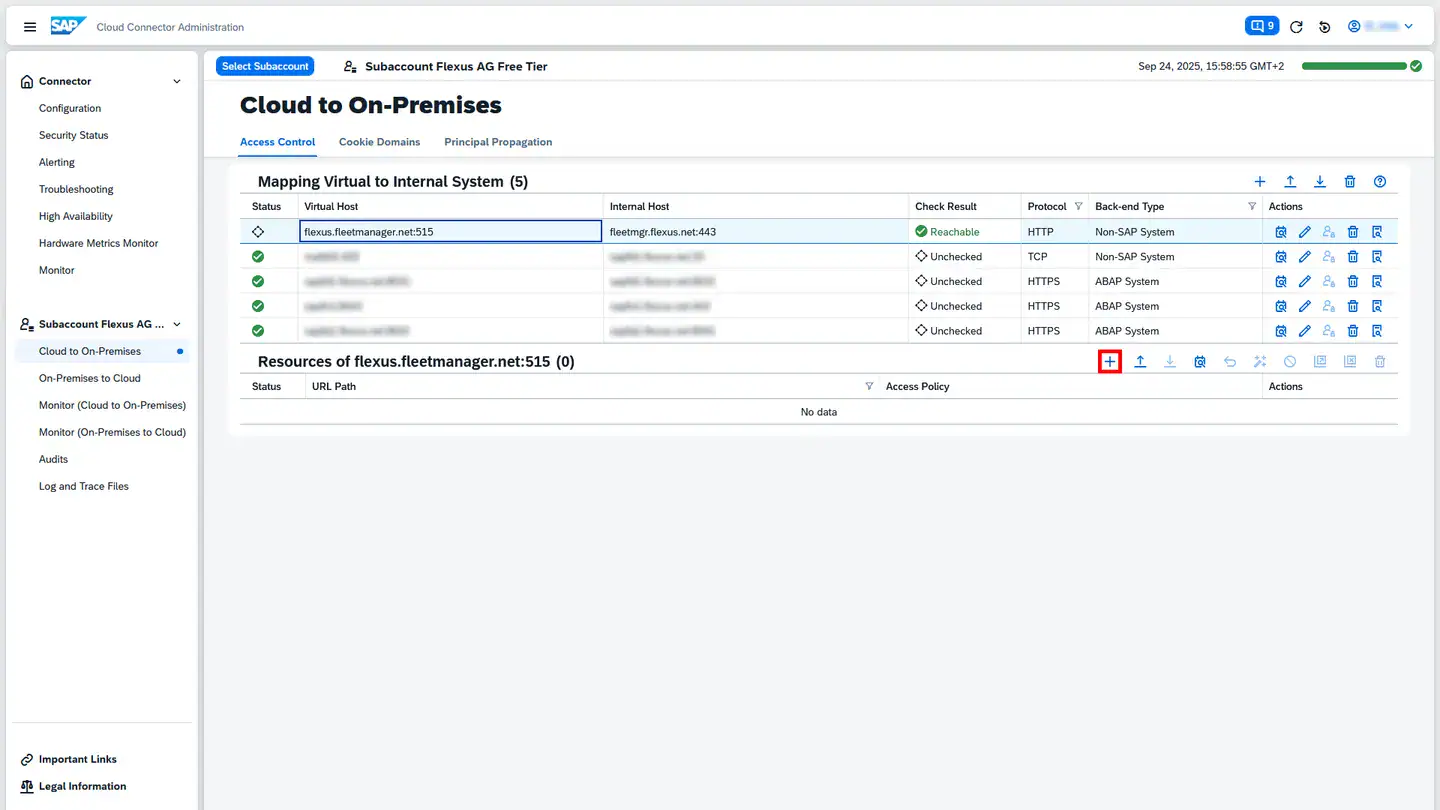
You can now create a resource for this system by clicking the plus icon to the right of Resources of <URL des Flottenmanagers> :
What is a Resource?
For security reasons, Cloud Connector blocks all network requests by default. To enable restricted access, you can configure resources. These interfaces are then exempt from the block and accessible externally.
The following screenshot shows a recommended configuration for both the MiR fleet manager and Agilox:
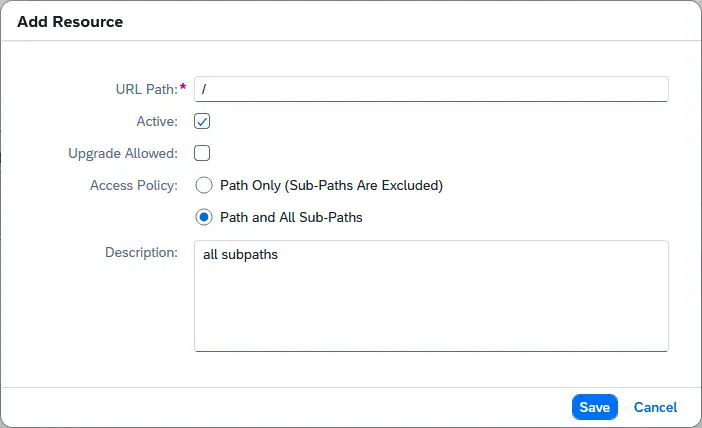
If needed, you can further restrict the URL Path to allow only specific subpaths. The configuration shown above permits external access to all paths on this host.
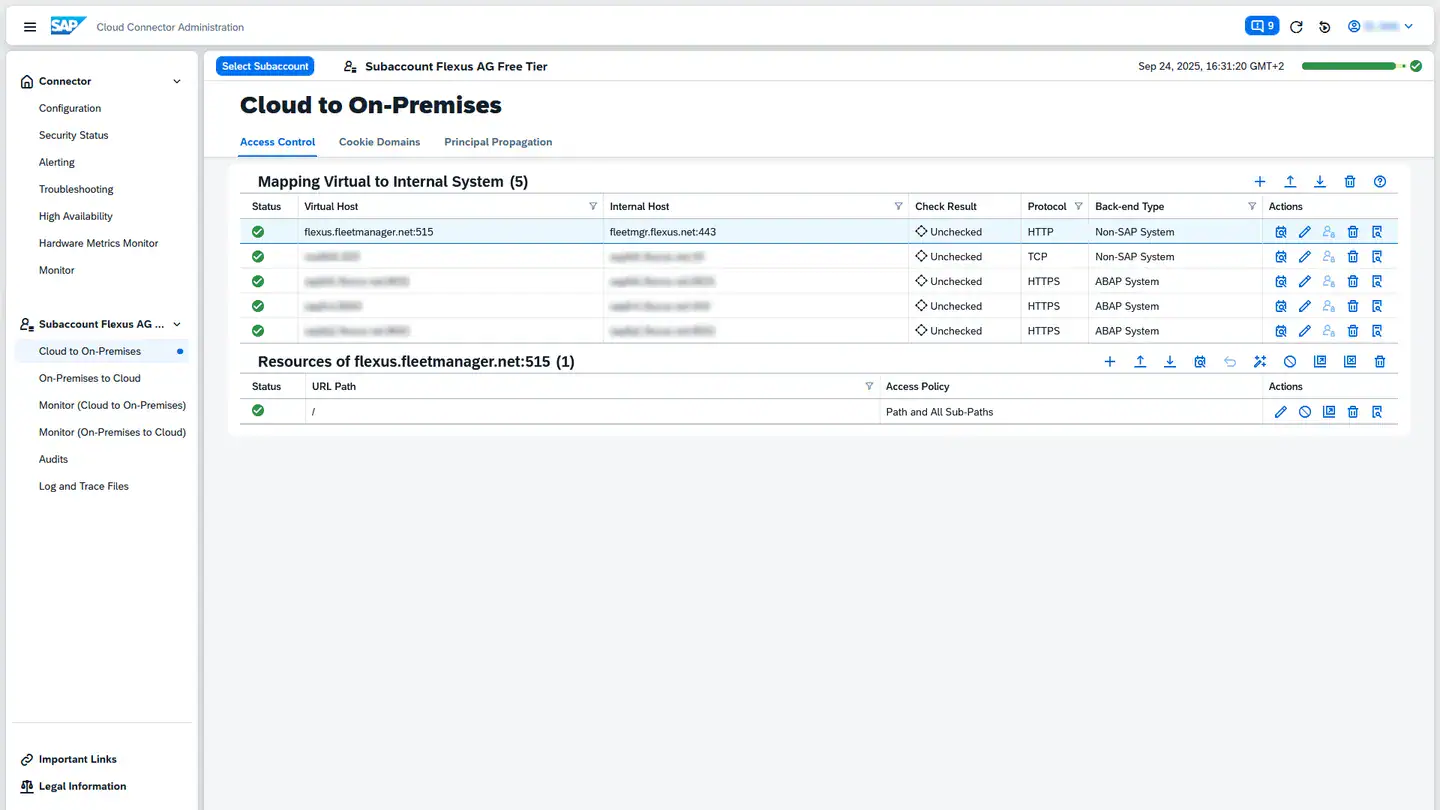
At this point, the Cloud Connector configuration is complete. As shown in the following screenshot, an additional Virtual Host with a resource should now appear in the Cloud To On-Premise section:
Configuration in the SAP BTP Cockpit
Once the Cloud Connector is configured and can connect to both SAP BTP and the internal system, you can create a destination in the SAP BTP Cockpit.
Applications use destinations to utilize the Cloud Connector’s secure connection.
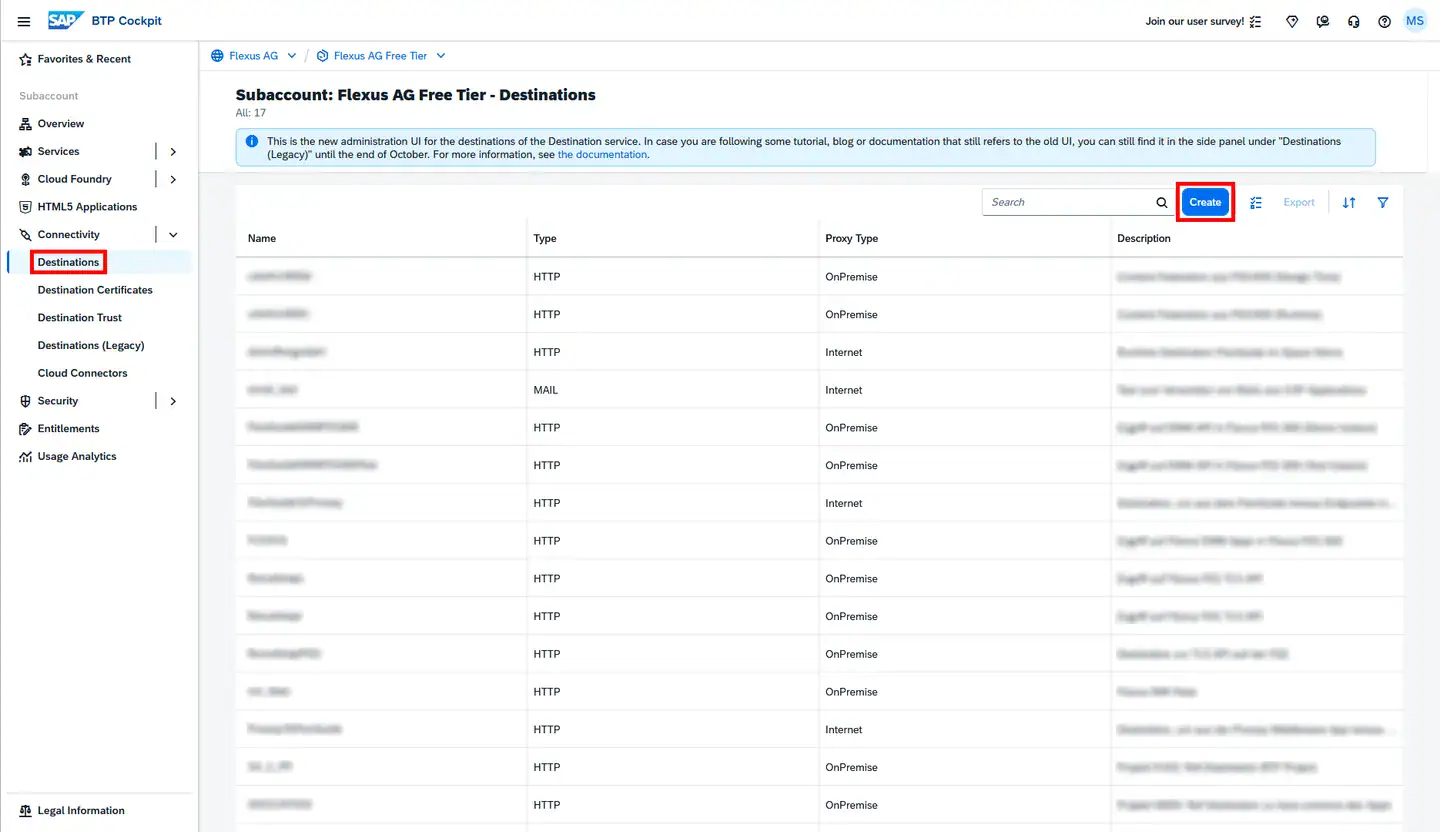
In the SAP BTP Cockpit, create destinations at the subaccount level. Click on the subaccount, and the Destinations entry should appear under Connectivity in the menu bar. Click the blue Create button to create a new destination.
In the dialog, select From Scratch. You can now specify the URL and authentication details for the corresponding system, as shown in the following example:
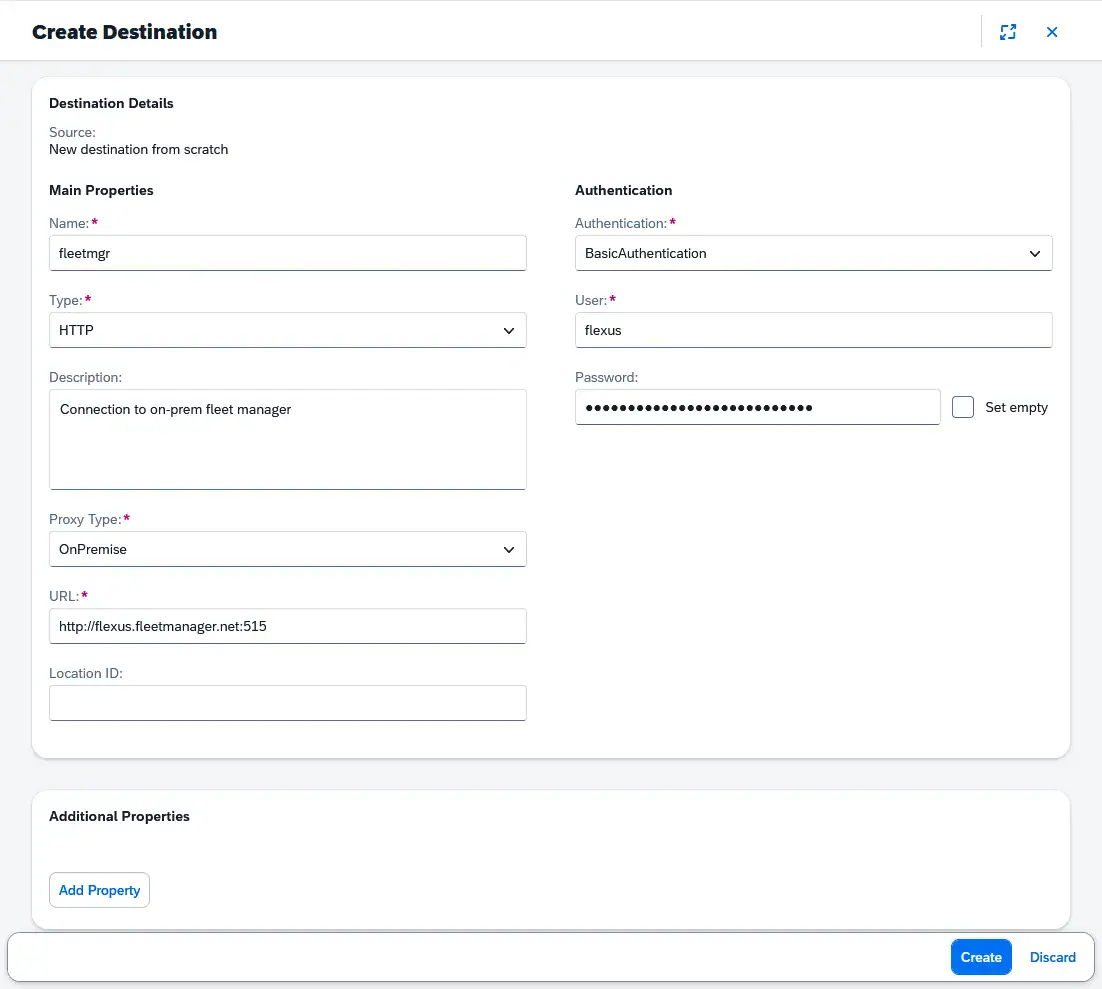
We recommend using a consistent naming convention for all destinations. For example, include the name or type of the target system.
Note on the MiR Fleet Manager
When configuring the destination to the MiR fleet manager, note that you cannot enter the standard password for authentication because the basic authentication deviates from the standard:
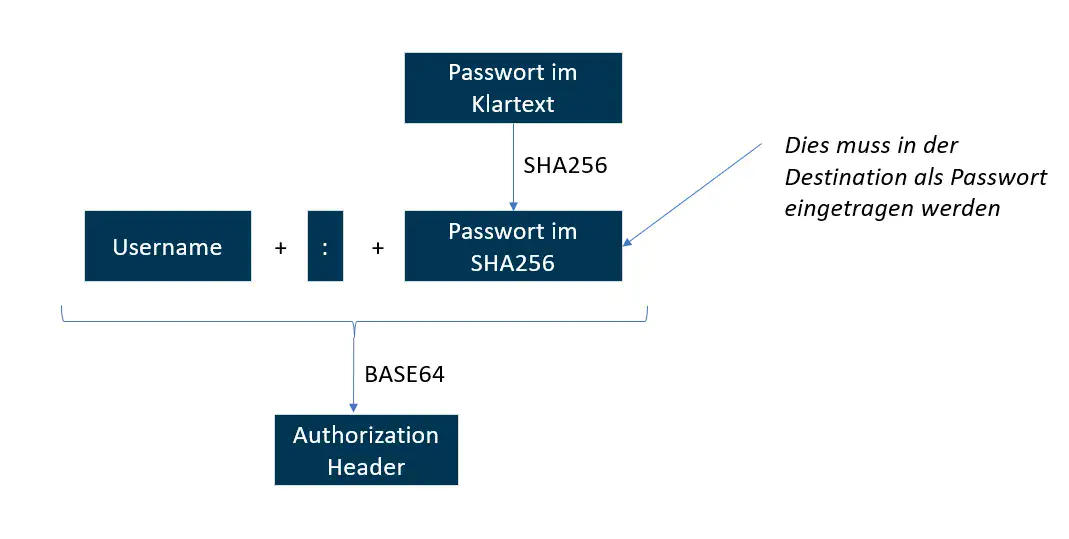
The graphic shows that you cannot enter the password for the MiR fleet manager directly in the destination—you must first convert it to SHA256. You can perform this conversion using online tools such as https://www.sha-generator.de/ or any installable tool. This is a standard conversion supported by many programs.