Key points:

The Cloud Connector can be connected to on-premises SAP systems.

A prerequisite for this is connecting the Cloud Connector to BTP.

Once the Cloud Connector is connected to both BTP and the on-premises system, you can establish a secure connection between the two.
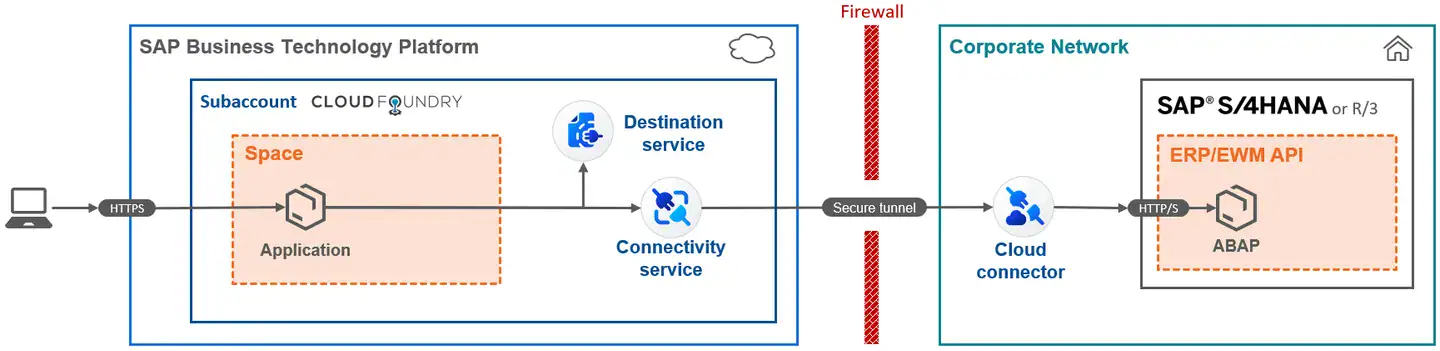
The SAP Business Technology Platform (BTP) is a cloud that is accessible from the internet. One of the most important functions of most applications running on SAP BTP is connecting to an on-premises SAP system. This is necessary to load internal company data or to modify it through functions.
Since an application running on the internet should not directly establish a connection to an on-premises SAP system, the Cloud Connector is used for this purpose. You can find more details about this software in our article about setting up the Cloud Connector.
In the following we will show you how the Cloud Connector and a BTP destination must be configured to establish a connection to an internal system. We presume that you have already set up the Cloud Connector and connected it to the subaccount. If you have not done so, consult said article on the Cloud Connector setup.
The following graphic illustrates the BTP architecture covered in this tutorial:
Configuration in the Cloud Connector
If you are connecting an EWM system, we recommend first configuring the relevant settings in the EWM system. From a purely technical standpoint, however, you can also complete this configuration after finishing this guide.
To establish a secure connection from SAP BTP via the Cloud Connector to an SAP ERP or S/4HANA system, you must add this connection in the Cloud Connector.
Note: The following configuration is an example for setting up FlexGuide4, a product by Flexus.
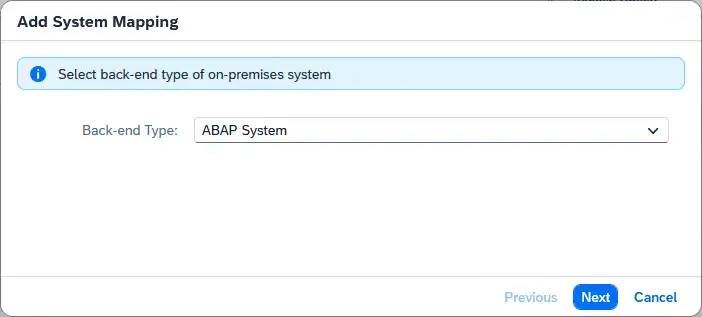
To do this, open the Cloud Connector and select the appropriate Subaccount. Then navigate to Cloud to On-Premise and click the + symbol. Select ABAP System as the Back-end Type.
Configure the following additional settings:
- Protocol: HTTPS
- Internal Host: According to the SAP system settings
- Internal Port: According to the SAP system settings
- Virtual host: should differ from the internal host for increased security in order to mask it
- Virtual Port: should also differ from the internal port
- Allow principal propagation: activated
- Principal Type: X.509 Certificate
- Note: This applies to Cloud Connector version 2.15 or higher. For 2.14.2 or lower, “X.509 Certificate (Strict Usage)” must be selected
- System Certificate for Logon: deactivated (as recommended in the documentation)
- Host In Request Header: Use Virtual Host
- System ID: optional
- Description: optional
- Check Internal Host: activated
The internal host corresponds to the address and port of the SAP system in your corporate network. The virtual host and virtual port are the host/port that are externally visible and help protect the internal host from exposure. Further, you can use the virtual host as an alias to quickly identify a given host (e.g. “development-system”).
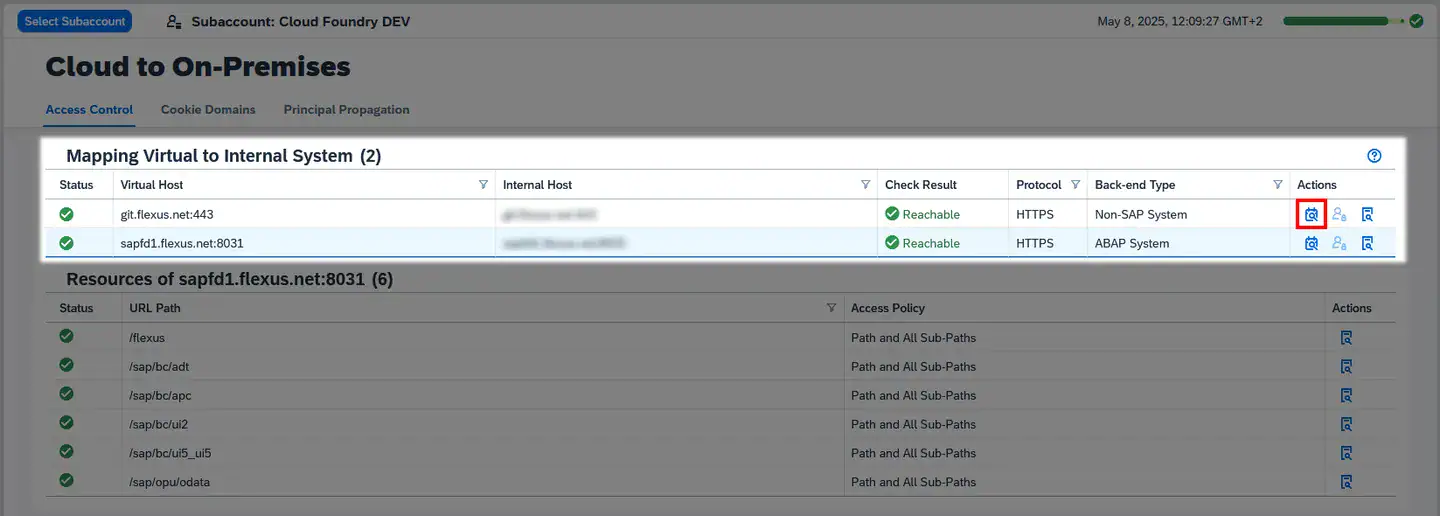
The Check Internal Host option verifies whether the Cloud Connector can reach the on-premise system via TLS. You can also run this check at any time by clicking Check availability of internal host in the corresponding table row:
For security reasons, Cloud Connector blocks all network requests by default. To allow limited access, you can configure resources. Resources are endpoints that are exempt from being blocked and accessible from outside.
Through these exposed resources, various systems can communicate with BTP. For FlexGuide4 by Flexus, for example, transport orders and master data are loaded from the SAP system, and updates to transport orders are sent back. For SAP EWM, you can retrieve data through an application programming interface (API) that is included with the product. To access data from other ERP modules (such as SAP MM), you must install an adapter developed by Flexus as an extension. This adapter provides an API for the relevant ERP module data. Finally, you can also load data from the Flexus product TLS Classic.
To create a resource, go to the Mapping Virtual to Internal System table and click the Virtual Host column in the row of the mapping you want. Then click the + symbol in the upper right of the resources table.
The following screenshot shows how to create a resource, using TLS Classic as an example:

Depending on the data source, you must specify different URL paths when creating resources:
- SAP EWM (requires two resources):
/sap/opu/odata4/sap/api_warehouse_order_task_2/srvd_a2x/sap/
/sap/opu/odata4/sap/api_warehouse_resource_2/srvd_a2x/sap/ - SAP WM: /flexus/flg4_adapter/v1/wm/
- TLS Classic: /flexus/tls4/rest/
Make sure Path And All Sub-Paths is activated.
The Cloud Connector is now configured so that transport orders from the SAP system can reach FlexGuide4, and updates can be sent back.
The Cloud Connector can connect not only to internal SAP systems, but also to non-SAP systems such as fleet managers. The article on connecting BTP with fleet managers provides more details.
Configuration in the SAP BTP Cockpit
Once the Cloud Connector is configured and can connect to both SAP BTP and the on-premise SAP system, you can create a destination. You do this in the SAP BTP Cockpit.
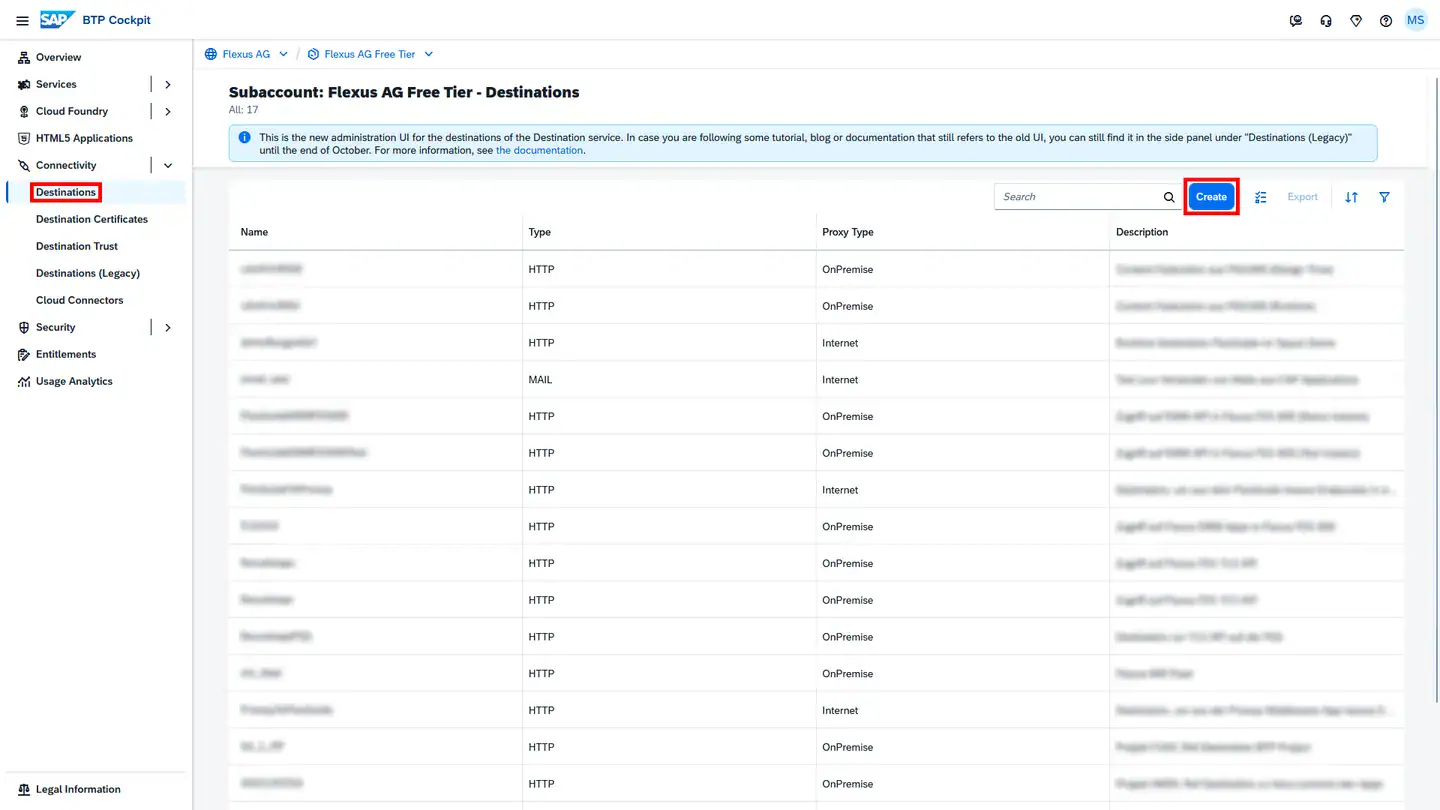
In the SAP BTP Cockpit, create the destination at the subaccount level. Navigate to the subaccount, where you should see Destinations under Connectivity in the menu bar. Click Create to add a new destination:
In the pop-up dialog that appears, select From Scratch. You can now securely store the SAP system access credentials in the destination. Here is an example setup:
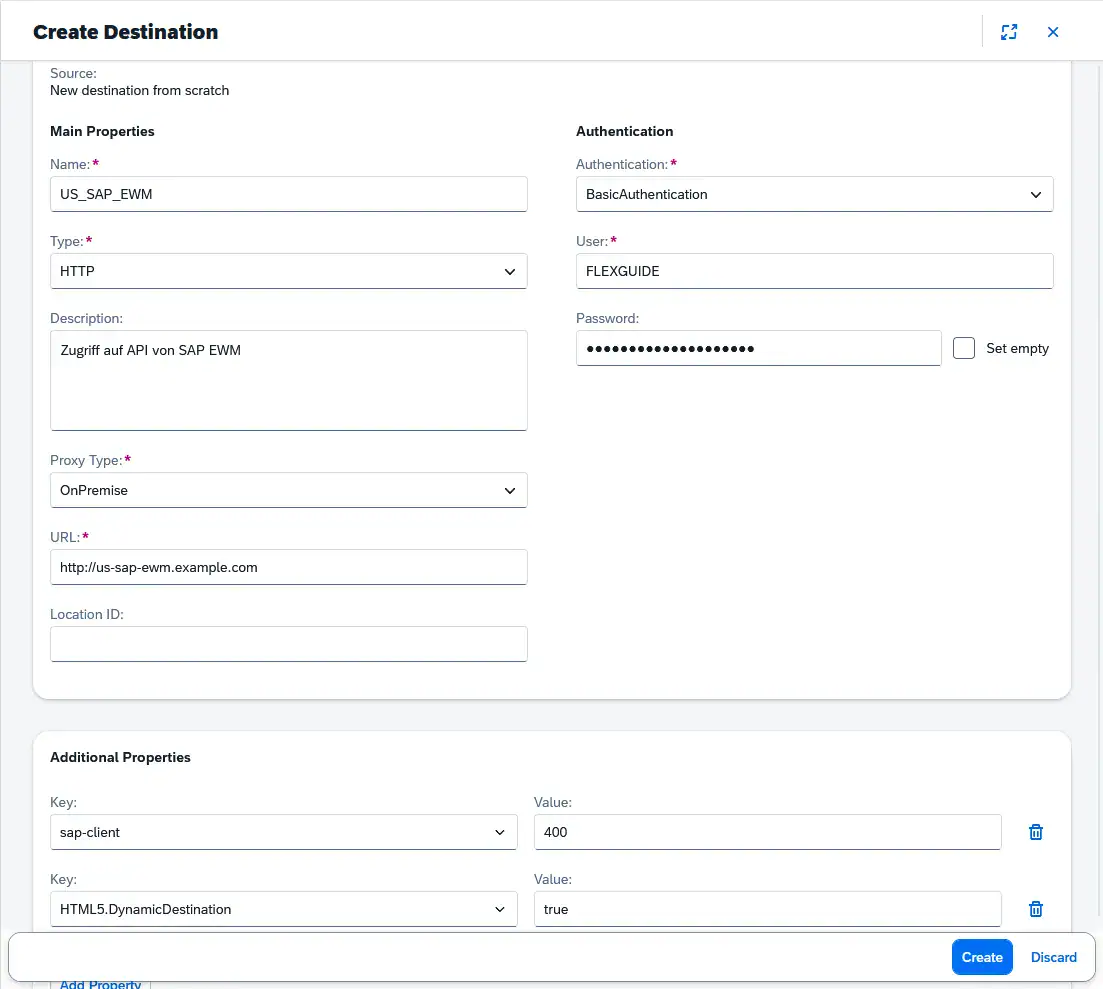
You can choose anything as the Name. We recommend naming all Destinations consistently—for example, including the name or type of the target system. However, the Destination name should remain the same across all stages, from development through quality assurance to production subaccounts. This is because for some Fiori apps, the destination is part of the configuration that cannot be changed between stages. Below are a few examples of sensible naming conventions:
- EMEA_SAP_ERP
- US_SAP_EWM
- AGV_FLEETMANAGER_HTTP
- AGV_FLEETMANAGER_HTTPS
When creating the new destination, add the following key-value pairs under Additional Properties:
- sap-client: Number of the SAP client
- HTML5.DynamicDestination: true
Our experience has shown that the latter setting improves the destination’s functionality.